Setting up and Configuring a UDP Data Source
UDP Sources
A UDP Data Source is technically a known port on the host system (system running TinMan RealTime) where UDP packets of information are arriving. These packets are typically being sent by a source application or external system of sensors or single sensor. TinMan RealTime creates a seperate and independent listener thread for each UDP Source created.
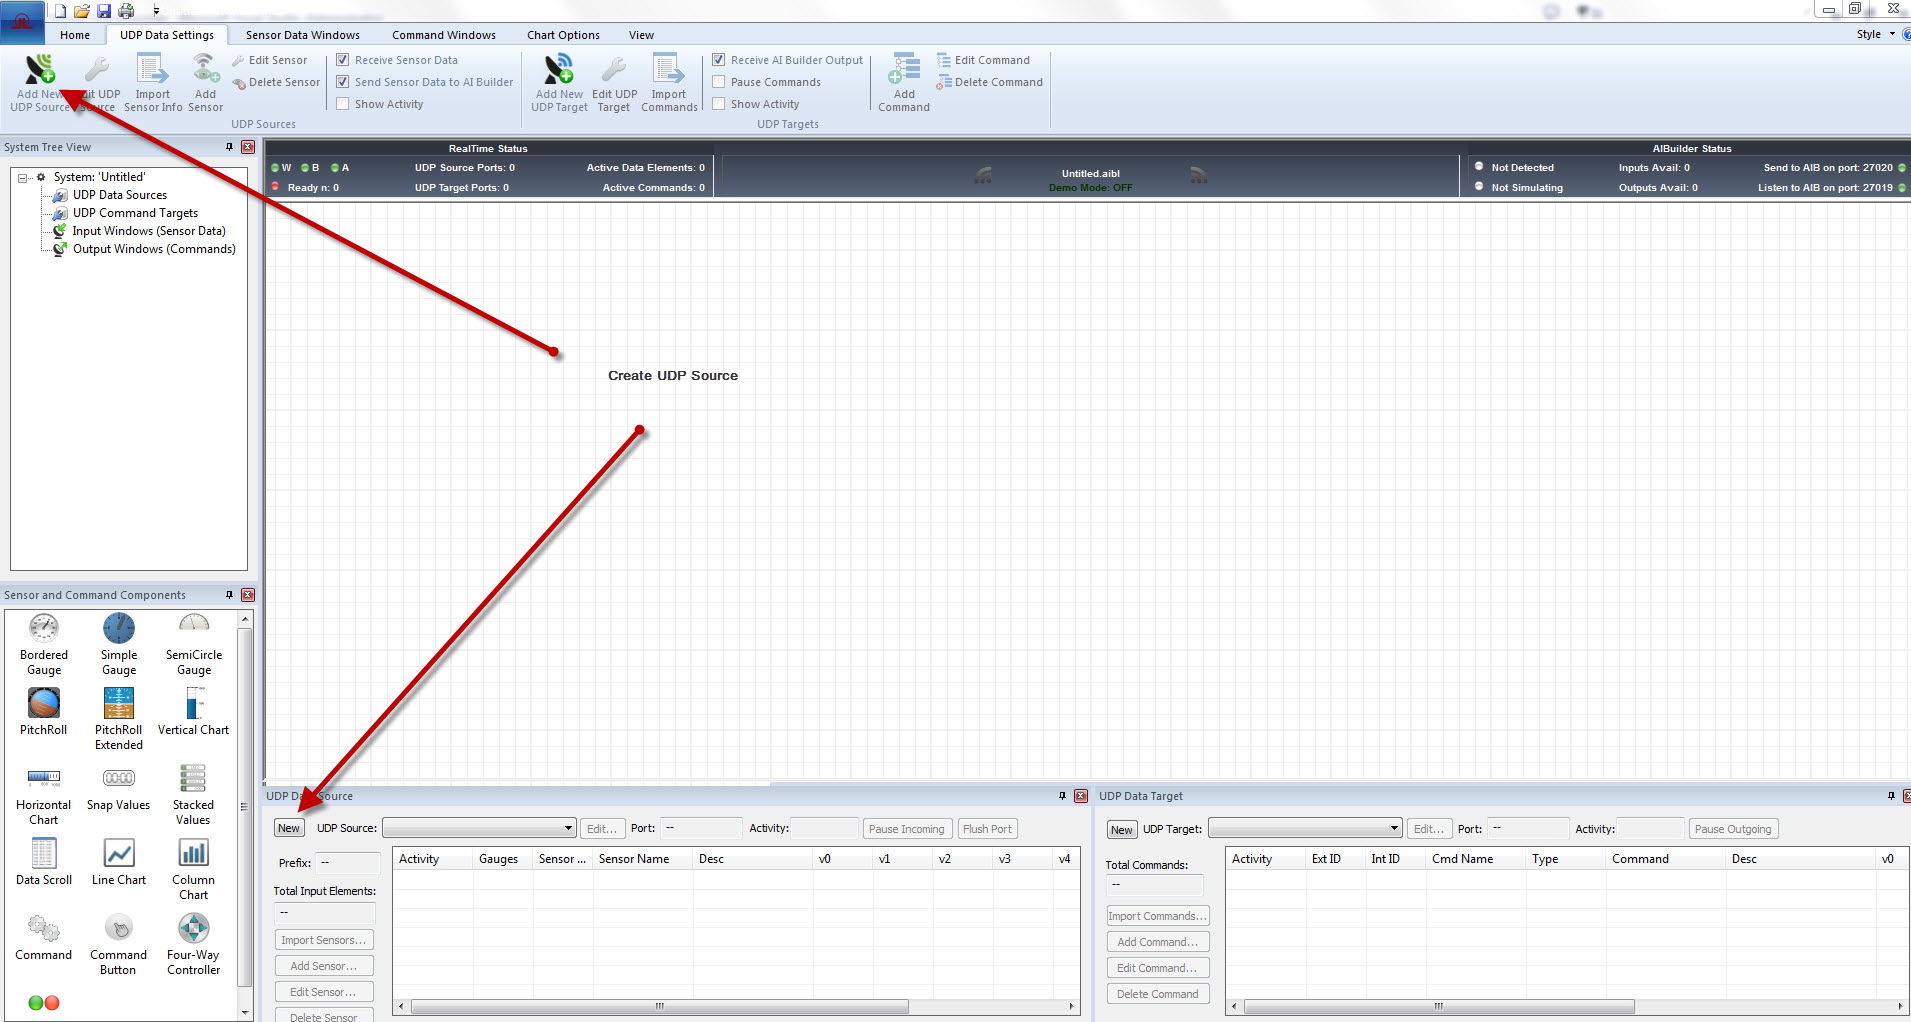
Create a New UDP Source by clicking the Create UDP Source button on the ribbon bar under the UDP Sources tab, or the New button on the UDP Sources Pane as indicated below:
After clicking the Add UDP Source button, you will be presented the first of two dialog screens in the UDP Source Setup Wizard. The first screen shown below asks for the name, source IP address, and the port number you know the data will be received at.

Give the source a name, and specify IP and port number. Select next.
You will then be presented the second of two screens in the UDP Source Setup Wizard, where you will specify the general structure of the incoming messages from this source. In this screen, you will tell the UDP message 'parser' for this source how to extract the sensor data from the datagram. There are 3 basic questions to address:

Message Format: Here you specify whether the incoming datagram holds its values in the form of a packed float (4 bytes per floating point value) or as a stored text value sent as a string. If your data is a text string containing comma separated values, choose comma delimited.
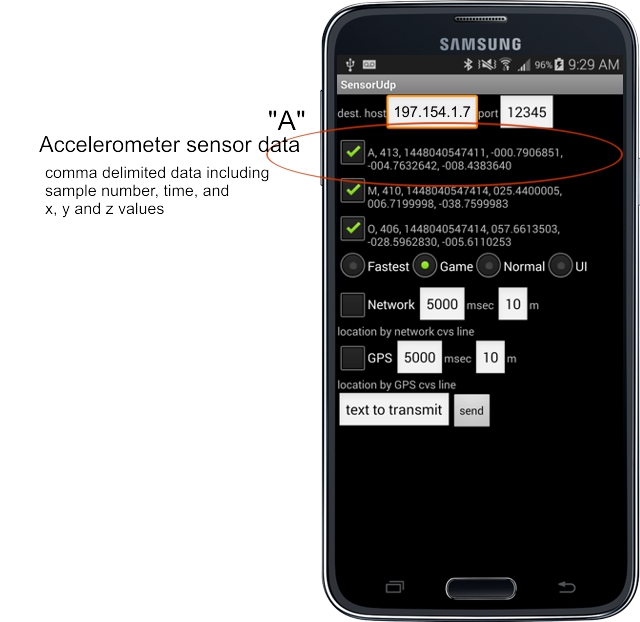
Highlighted for example is the line of data referring to the Accelerometer.
Message Content: Here we specify three things. The first thing to state is whether or not each datagram coming from this UDP source has a PREFIX as the first few characters of the string. For instance, in X-Plane 10 (flight simulation software), the prefix for all sensor datagrams is "DATA@" - 5 characters. The answer to this question lies in your understanding of the data source itself. If there is no prefix, then simply leave the box unchecked. If there is one, then check the box, and state in the "Prefix:" box what those characters are. The last item in the Message Content section is the Multi-sensor Messages checkbox. Check this box if there can be more than one sensor's data in a single UDP message. RealTime knows to continue parsing the incoming message and accept additional sensor id's. This is primarily an efficiency item. There is no harm in specifying yes to this question when there is only one sensor per datagram.
Sensor Identifiers: Lastly, the Sensor Identifiers information must be provided. If the incoming datagrams are text characters that are to be interpreted as strings, and these strings contain the name identifiers of the sensor, then check the String IDs radio button. For instance the Sensor UDP Android app used in many of the RealTime demos, uses single character text descriptors for each of the Accelerometer (A), Magnetometer (M) and Gyro (G) sensors. On the other hand, if the identifiers are integer IDs that are embedded as an ASCII character code (such as with X-Plane 10) then check this radio button. This would instruct RealTime to consider a binary character code of an ascii symbol as the ID of the sensor.
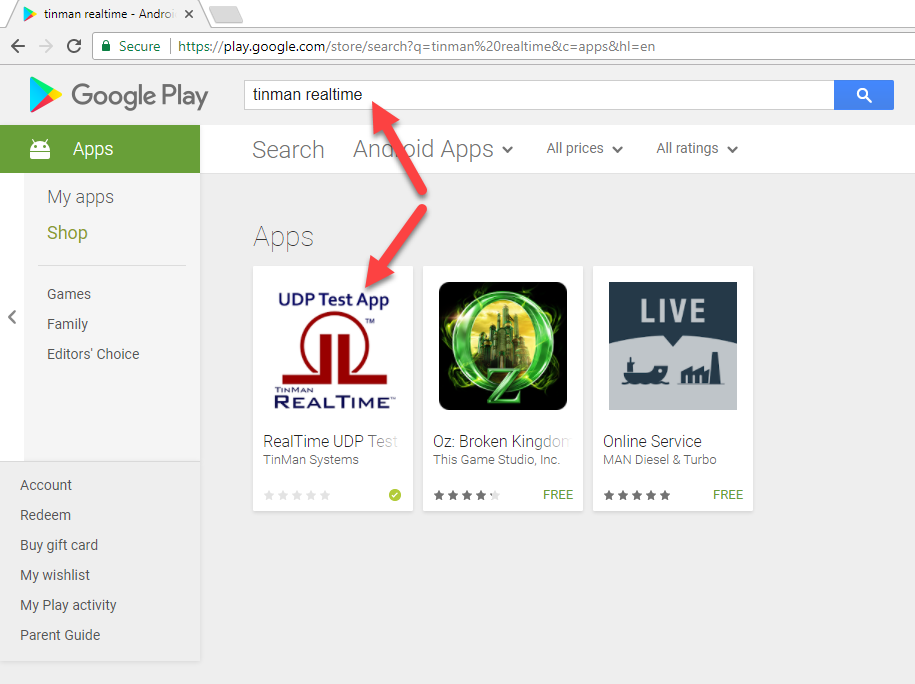
As an FYI: Here is a screenshot of TinMan Systems' Android UDP Sensor application that is used in the sample project above: (simply go to the Google Play store on the Android device, search for "TinMan RealTime" and download this app specified by the red arrow) - ADDITIONAL INSTRUCTIONS BELOW FOR TARGETING THE RIGHT IP AND PORT FOR THIS USAGE SCENARIO.
If you are using the Sensor UDP app downloaded from the Google Play store on your Android Cell Phone, the destination IP address that should be entered is either your Public IP address (if you are outside your own personal network), or your "local IP address" (if inside your own personal network).
Here is how to find out your local IP Address on Windows:
- Go to the Windows Start Menu
- Click on the "Run" menu item, and type "cmd.exe" at the Run prompt
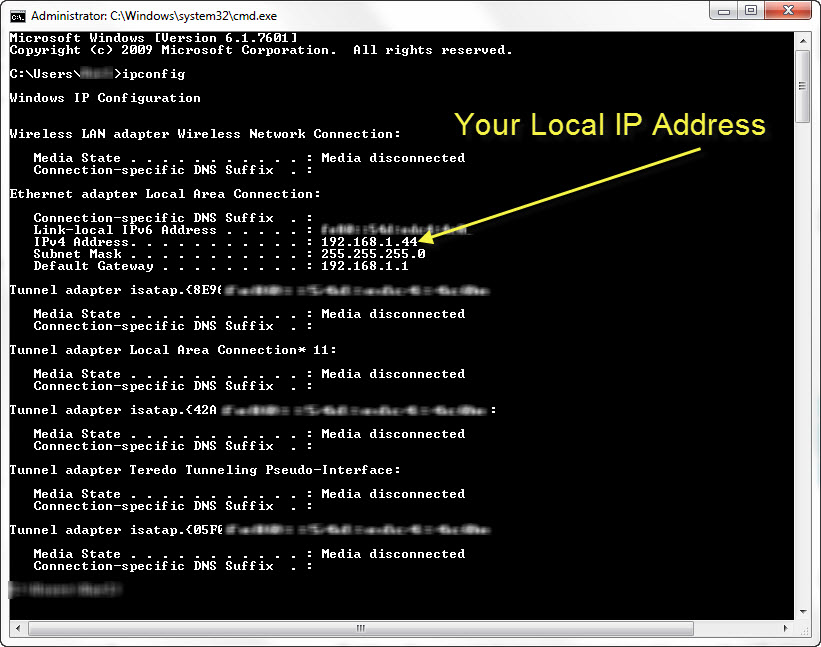
- With a DOS command window open, type "ipconfig" and press Enter on the keyboard. Your IP address, subnet mask and default gateway will be returned to you. If your IP address is 192.168.x.x, 10.x.x.x, or 172.16.x.x, then you are receiving an internal IP address from a router or other device. The IP address that the world sees is that of the router. You should see this screen (or something similar):
If you are using a network router (as above), you may need to configure it for "Port Forwarding". Port forwarding simply forwards on data that comes to the router at a specific port (such as UDP port 12345) that we use in the above example. Look up "Port Forwarding" in your router admin guide to see the menu location for forwarding data from this port to your local IP address when UDP data is received.
One other point, if you are trying the Android example, and using the Android utility app as shown in the Google play store screen shot: When you begin transmitting data to RealTime, be sure to tap the "Text to Transmit" button on the cell phone app once and this should begin that Apps transmission. (that is the way he designed that cellphone app...)